How to configure MailRelay
If you are going to send a large number of emails or even newsletters from your domain, it is recommended to use an external email provider for this purpose, so that if a blacklist detects that sending and marks it as SPAM, it does not affect the rest of the emails sent from your domain.
Mailrelay is an excellent solution and also offers a free plan.
How to correctly configure the SPF record in Mailrelay
The first thing will be to create an account with them, which you can do from Mailrelay.com
Once the account is created, you can associate a customized subdomain, this step is very simple, you just need to click on the left column on "Setup – Custom Domain," this way you can access Mailrelay's email manager from a subdomain of your own domain, without needing to access their website for this purpose.
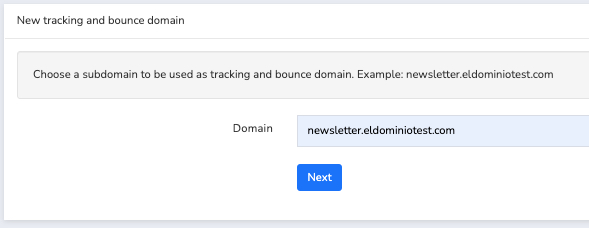
In the text field that appears, we will indicate the subdomain we wish to use, and it will show us the CNAME to create in our domain management area:
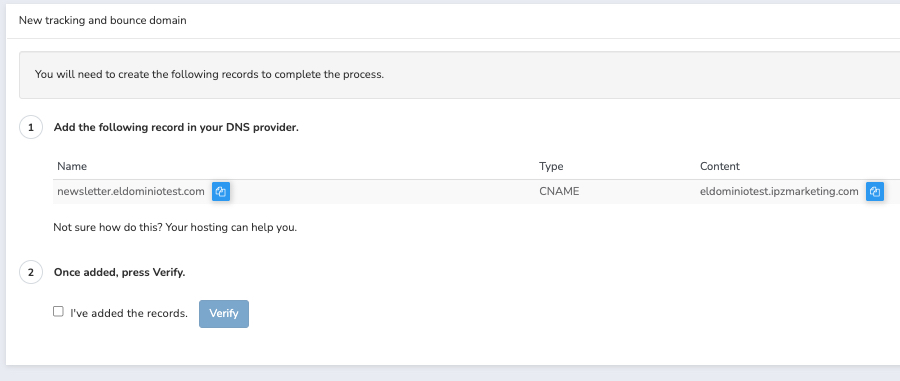
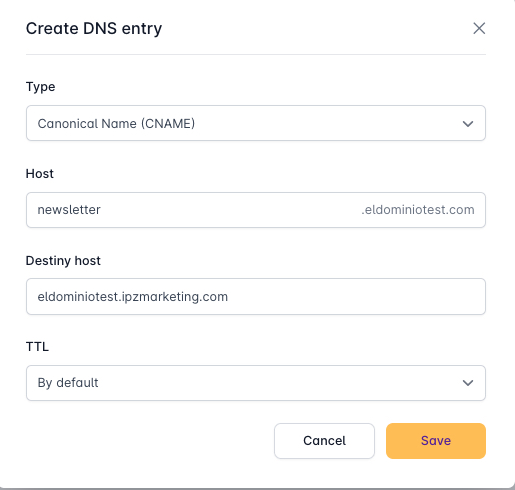
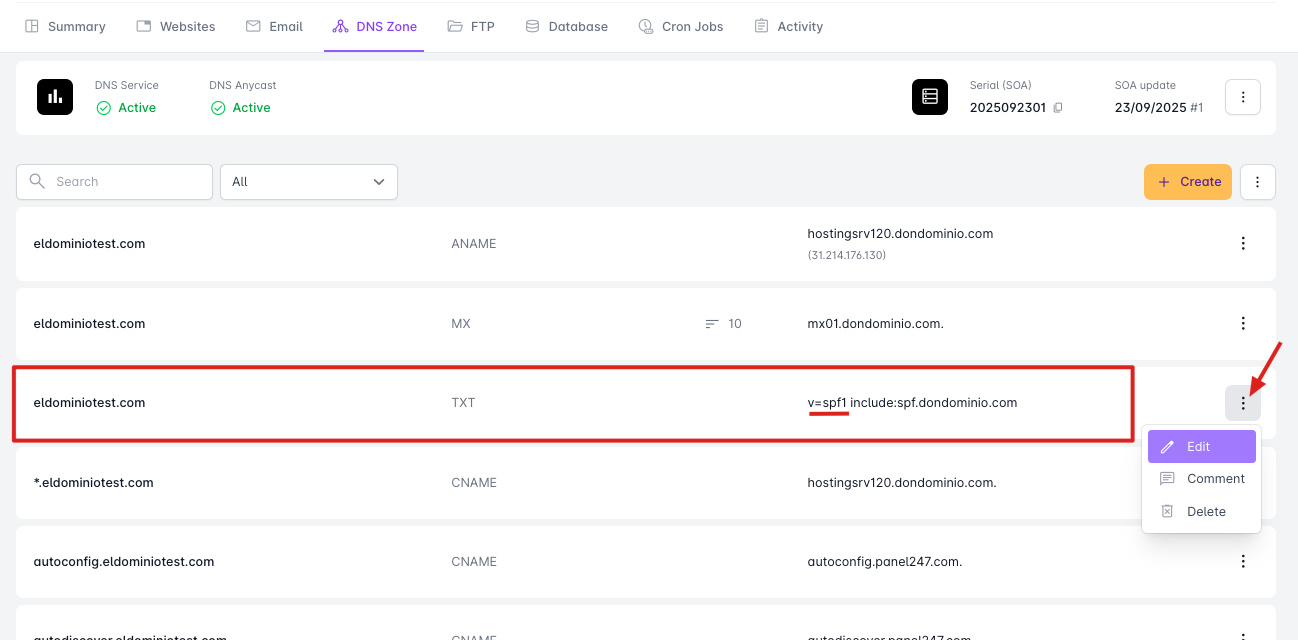
Now we will access our client area and access the DNS Zone of the domain hosting, through the "Hosting and Email" section, clicking on the name of the domain in question.
Once inside, we will create the DNS record with the data indicated in the previous image:
Type: CNAME
Host: newsletter
Destination: eldominiotest.ipzmarketing.com
(Remember to modify the domain name to your own)
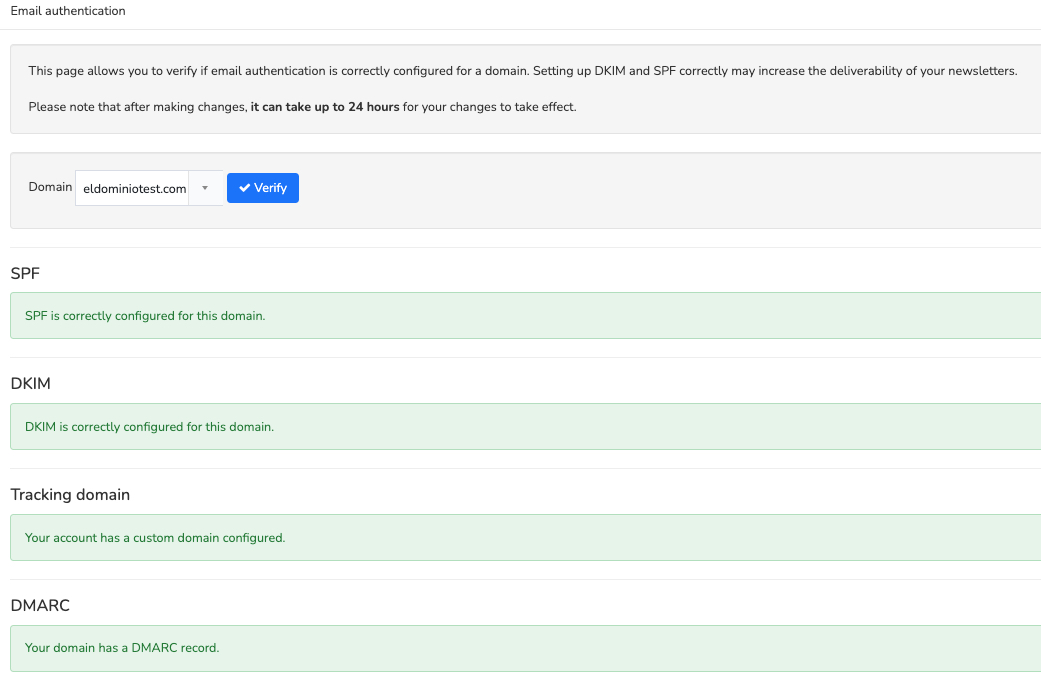
Now we have the custom domain configured, but to send without issues, we must return to the MailRelay panel and now access the "Email Authentication" section, in the "Settings" section of the side menu:
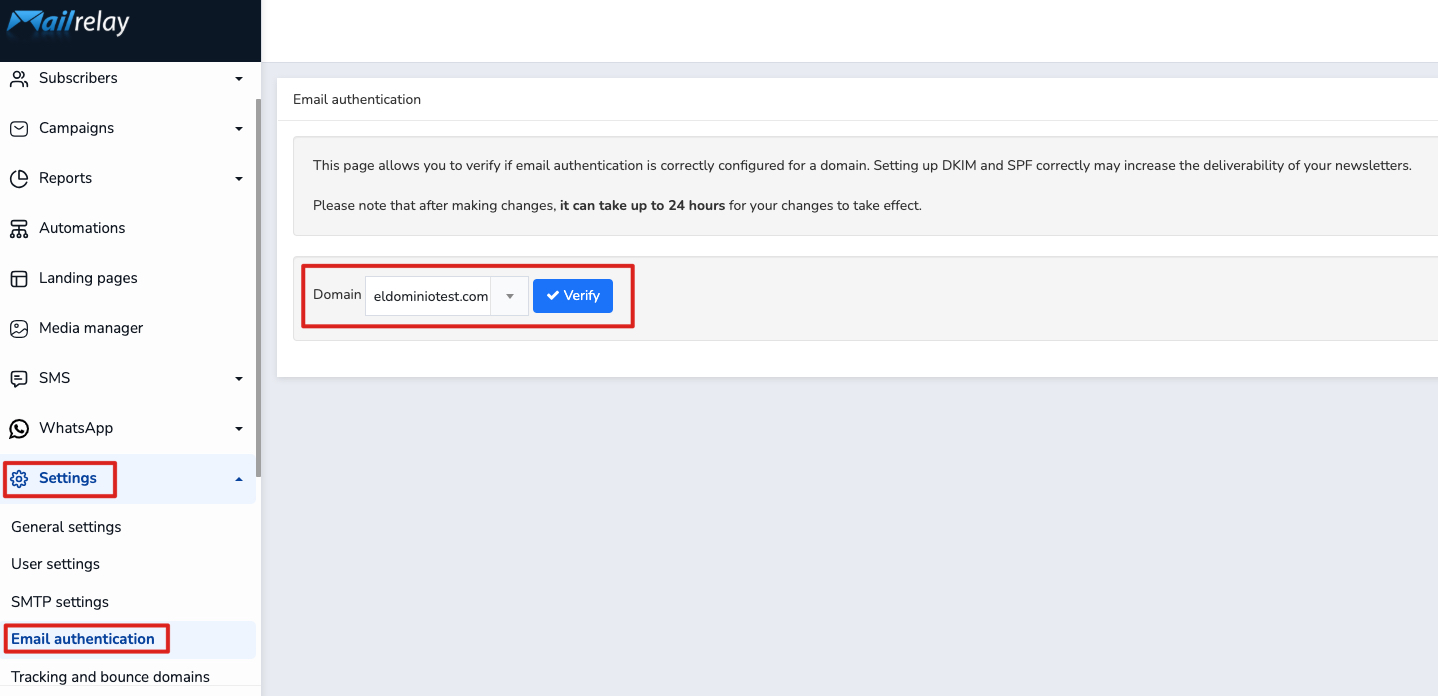
We will press the "Check" button to obtain the instructions for the records we must add in our domain's DNS Zone.
With these instructions, we must go back to our domain's DNS Zone and create/modify the records indicated.
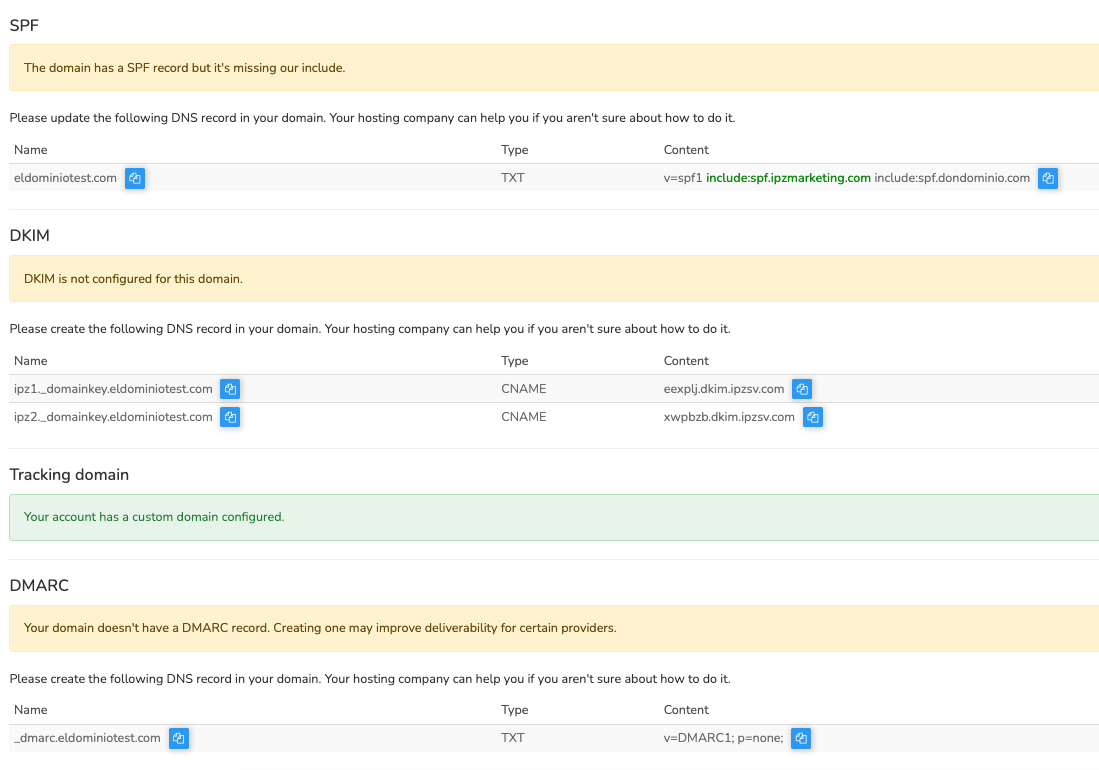
The "Values" we must enter are obtained from these instructions provided by MailRelay, after clicking "Check" in the "Email Authentication" section.
SPF:
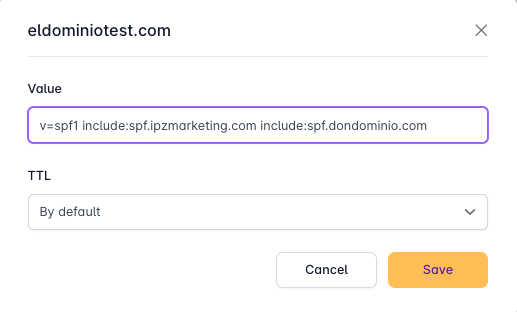
The SPF record already exists, and instead of creating a new record, we must identify and "modify" the record to change its value to what MailRelay indicates.
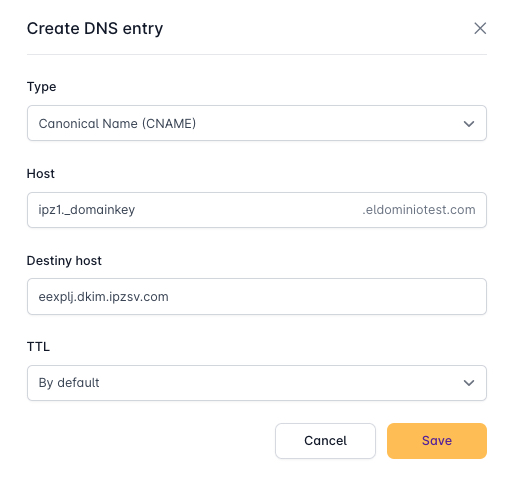
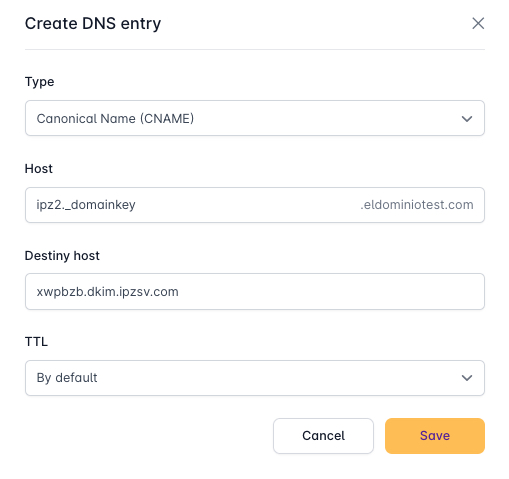
DKIM:
We will create new records with the "Create" button at the top right, in the DNS Zone.
DMARC:

Once this is done, we will return to the MailRelay page and press "Check" again, and if we have done everything correctly, we should see the list as follows: